Raising Cane’s Chicken Fingers Copycat Recipe

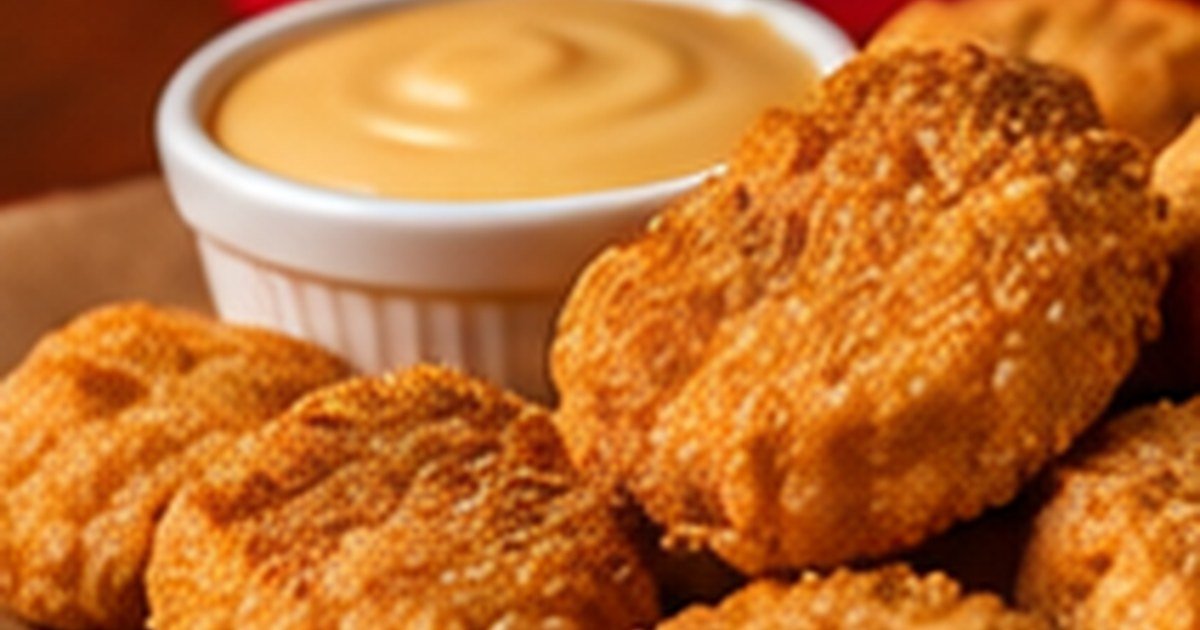
Raising Cane’s chicken fingers are built around a simple idea: tender chicken, a crisp seasoned coating, and a hot, fresh finish. This Raising Cane’s chicken fingers copycat recipe gives beginners a practical homemade version without claiming to reproduce the restaurant’s secret seasoning or process exactly.
Raising Cane’s says its chicken is marinated, hand-battered, and cooked to order. At home, you can follow the same broad principles with chicken tenderloins, a seasoned buttermilk-style marinade, flour, and a dependable frying method. The result is juicy chicken with a light, craggy crust that pairs naturally with a creamy dipping sauce.
Raising Cane’s Chicken Fingers Copycat Recipe for Beginners
This recipe focuses on three things: moisture, coating, and temperature control. The marinade seasons the chicken and helps the flour mixture cling. A well-seasoned dry coating creates the crisp shell, while steady oil temperature keeps the crust from turning greasy.
This is an independent copycat-style recipe. The restaurant does not publish its full seasoning formula, so the ingredients below are designed to create a familiar Southern-style chicken finger flavor rather than imitate a proprietary recipe ingredient for ingredient.
For the best texture, use chicken tenderloins that are similar in size. Even pieces cook at roughly the same rate, which makes the process easier for beginners.
Ingredients You’ll Need
For 4 servings, use:
- 1 1/2 pounds chicken tenderloins
- 1 cup buttermilk
- 1 large egg
- 1 teaspoon Worcestershire sauce
- 1 1/2 cups all-purpose flour
- 1/4 cup cornstarch
- 1 1/2 teaspoons kosher salt, divided
- 1 teaspoon black pepper
- 1 teaspoon garlic powder
- 1 teaspoon paprika
- 1/2 teaspoon onion powder
- 1/4 teaspoon cayenne pepper, optional
- Neutral frying oil, such as canola or vegetable oil
Cornstarch helps the coating stay crisp, while flour provides structure. You can make the recipe with flour only, but the crust may be slightly softer.
Buttermilk gives the marinade body and mild acidity. If you do not have buttermilk, mix 1 cup of milk with 1 tablespoon of lemon juice or white vinegar and let it sit for about 5 minutes before using.
Marinate the Chicken
Pat the chicken dry with paper towels and place it in a bowl or zip-top bag. Whisk together the buttermilk, egg, Worcestershire sauce, and 1/2 teaspoon salt, then pour the mixture over the chicken.
Refrigerate for at least 2 hours. Four to eight hours gives the seasoning more time to work, but you do not need to marinate overnight for good results.
Keep raw chicken refrigerated during the entire marinating period. Do not reuse marinade that has touched raw poultry unless it is boiled thoroughly, and for this recipe it is simpler to discard the used marinade.
Make the Seasoned Coating
In a wide bowl, combine the flour, cornstarch, remaining salt, black pepper, garlic powder, paprika, onion powder, and optional cayenne.
Mix thoroughly so the spices are evenly distributed. A poorly mixed flour blend can leave some pieces bland and others overly salty.
For a more textured crust, drizzle 1 to 2 tablespoons of the buttermilk marinade into the flour mixture and rub it between your fingertips. This creates small flour clumps that turn into crisp ridges when fried.
How to Bread the Chicken Fingers
- Remove one tender from the marinade and let the excess drip off for a few seconds.
- Place it in the seasoned flour and press the coating firmly onto every side.
- Shake off loose flour, then place the coated tender on a wire rack or tray.
- Repeat with the remaining chicken.
- Let the breaded chicken rest for 10 minutes before frying.
That short rest helps the coating hydrate and stick. If you move the chicken straight from flour to oil, some of the crust can break away more easily.
Do not stack the breaded pieces. Keeping them in a single layer protects the coating while you heat the oil.
How to Fry the Chicken Fingers
Pour about 1 1/2 to 2 inches of neutral oil into a heavy skillet or Dutch oven. Heat the oil to about 350°F.
Fry the chicken in small batches. Crowding the pan drops the oil temperature quickly and can make the coating absorb more oil.
Cook the tenders for about 3 to 5 minutes per side, depending on thickness, until the coating is golden and the center reaches a safe temperature. The USDA recommends cooking poultry to a minimum internal temperature of 165°F.
Use an instant-read thermometer in the thickest part of a tender. Color alone is not a reliable safety test.
Transfer cooked tenders to a wire rack instead of a paper towel-lined plate. Air can circulate underneath the chicken, which helps the bottom crust stay crisp.
How to Keep the Coating Crisp
Oil temperature is the biggest factor. If the oil is too cool, the breading absorbs oil and becomes heavy. If it is too hot, the outside darkens before the chicken cooks through.
Try to keep the oil between roughly 335°F and 360°F while frying. The temperature will fall when chicken enters the pan, so give the oil a little time to recover between batches.
A wire rack also makes a difference. Paper towels trap steam against the bottom surface, while a rack lets moisture escape.
If you need to hold several batches for a few minutes, place the rack on a sheet pan in a 200°F oven. Do not cover the chicken because trapped steam softens the crust.
Air Fryer Option
An air fryer will not create exactly the same crust as deep frying, but it can produce a crisp and convenient chicken finger.
Preheat the air fryer to 390°F. Lightly spray the breaded tenders with neutral oil and arrange them in a single layer with space between each piece.
Cook for about 10 to 14 minutes, turning halfway and spraying any dry flour spots. Check that the thickest piece reaches 165°F before serving.
The air-fried version works especially well when you want easier cleanup. The crust will be drier and less deeply fried, but the marinade still keeps the chicken tender.
What to Serve With the Chicken Fingers
The classic combination is simple: chicken fingers, fries, toasted bread, coleslaw, and a creamy dipping sauce.
For a DishOnMenu-style copycat meal, pair these tenders with our Raising Cane’s sauce copycat recipe. Make the sauce several hours before cooking so its garlic and pepper flavors have time to blend.
- Crinkle-cut fries
- Homemade Texas toast
- Coleslaw
- Pickles
- Potato wedges
- Corn on the cob
- A simple green salad
Keep side dishes straightforward. The chicken and sauce are already rich, so something crisp or acidic can balance the plate.
Common Mistakes to Avoid
Do not skip drying the chicken before adding the marinade. Excess surface water can dilute the mixture and make the coating less consistent.
Avoid packing too much flour onto the chicken. Press enough to build a textured crust, then shake off loose flour that would otherwise fall into the oil and burn.
Do not guess the oil temperature. A clip-on or instant-read thermometer makes frying much easier and more repeatable.
Finally, do not overcrowd the skillet. It is faster to cook two or three controlled batches than one large batch that drops the oil temperature and produces uneven chicken.
Make-Ahead and Storage Tips
You can mix the dry coating a day ahead and keep it covered at room temperature. The chicken can marinate in the refrigerator earlier the same day.
Fried chicken is at its best soon after cooking. If you have leftovers, refrigerate them within 2 hours and use them within 3 to 4 days, following USDA guidance for cooked leftovers.
Reheat chicken fingers in an air fryer or 375°F oven until hot throughout. These methods restore more crispness than a microwave.
Do not store leftover dipping sauce in a container that raw chicken or raw-chicken utensils touched. Keep sauce and raw poultry completely separate during preparation.
FAQs: Raising Cane’s Chicken Fingers Copycat Recipe
Q. Is this Raising Cane’s official chicken finger recipe?
A. No. This is an independent copycat-style recipe. Raising Cane’s does not publish its complete proprietary seasoning or preparation formula.
Q. Can I use chicken breasts instead of tenderloins?
A. Yes. Slice boneless chicken breasts into even strips so they cook at a similar rate.
Q. Why is my breading falling off?
A. Let excess marinade drip away, press the flour firmly onto the chicken, and rest the breaded pieces for about 10 minutes before frying.
Q. Can I make these without deep frying?
A. Yes. An air fryer or oven works, although the crust will be different from a traditionally fried chicken finger.
Conclusion
This Raising Cane’s chicken fingers copycat recipe gives home cooks a straightforward way to make tender chicken with a crisp, seasoned coating. The most important steps are marinating the chicken, controlling oil temperature, and checking the center with a food thermometer.
Serve the chicken hot with fries, toast, coleslaw, and your favorite dipping sauce. Once you are comfortable with the basic method, you can adjust the seasoning and choose frying or air frying based on the meal you want.
Disclaimer: This is an independent copycat-style recipe and is not an official Raising Cane’s recipe. Restaurant ingredients and preparation methods may differ. Always handle raw poultry safely and cook chicken to a minimum internal temperature of 165°F.